Many DIY projects contain some acrylic
components, knowing the right tools and techniques to use
with acrylic will make DIY projects easier and more successful.
One of the main problems in working with acrylic is that
it does not transfer heat very well. Always keep this in
mind when using tools with acrylic. Heat from a tool will
put stress in the acrylic, which may cause crazing later.
Remember to always wear safety glasses when cutting, routing
or drilling acrylic, because small plastic chips can come
flying off of the tool. It is best to begin with small projects
to hone your skills before tackling major projects such
as building a large tank.
Cutting Acrylic
There are several ways to cut acrylic.
A water-jet cutter is one of the best ways to do it, but
a water-jet cutter is too expensive for most of our budgets.
If there is a large machine shop locally they may have one.
For a simple DIY acrylic project at home, a table saw or
radial arm saw with a blade that is designed for cutting
acrylic will work fine. A Freud LU-94-10 saw blade works
very well for cutting acrylic, it has a triple chip grind,
3-degree hook and .110" kerf. McFeely's* carries the
Freud LU-94-10 for $69.50. A zero clearance table saw insert
and a pair of blade stabilizers would also help make better
cuts by reducing blade vibration. Rockler* carries zero
clearance table saw inserts for $21. Woodcraft (1-800-225-1153)
carries blade stabilizers for $15. Always try to feed the
acrylic into the saw blade at a steady rate, feeding it
too fast or too slow may case the edge to melt. Many plastic
shops use a panel saw to cut acrylic. It works well for
the core of their business, but may not give a cut that
is accurate enough for the precision required in the construction
of a sump or tank. If you decide to have a plastic shop
cut your acrylic, be sure to tell them that all of the sides
must be the same width and length. Acrylic of 1/8"
or less thickness may be scored like glass and snapped apart.
This process may not, however, leave an edge that is flat
enough for capillary gluing.
|
|
|
|
|
Freud LU-94 sawblade
|
Zero clearance
|
Acrylic scoring knife
|
Drilling Acrylic
Heat is a problem when drilling acrylic
because it causes the acrylic to melt and/or crack. Normal
twist drills may chip and crack acrylic because of their
tendency to lift and twist the acrylic rather than scraping
it like a drill, which is designed for acrylic. A normal
twist drill can be modified for use on acrylic with a bench
grinder. Instructions for this modification can be found
in the DIY section of my website.
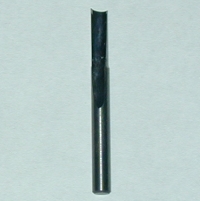
Specially ground and polished drill bits designed just for
acrylic are available from U.S. Plastic* in a few sizes.
When using a drill bit made for acrylic there will be a
long curly strand of acrylic created during the drilling
process. The drill press should be set from 500 to1000 RPM.
Always start and end the hole at a slow feed rate. Once
the hole is started a feed rate of around 3 1/2" per
minute works well. If a number of holes are being drilled,
be sure and let the bit cool off frequently so as not to
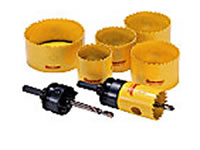
overheat the acrylic. Normal hole saws can be used to make
large holes in acrylic, however it is very difficult to
keep them from melting the tiny acrylic chips, causing the
chips to stick to the side of the hole. A hole saw should
be fine if you are making a hole to be used for a bulkhead
fitting. It always helps to have a piece of plywood behind
the acrylic being drilled so it has some backing when the
drill bit cuts through. Remember: don't drill too close
to the edge of a piece of acrylic as it has a tendency to
crack towards the edge. A hole should not be drilled any
closer than 1.5 times the diameter of the hole measured
from the center of the hole to the edge of the acrylic.
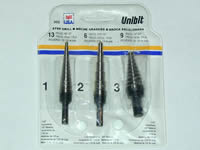
Unibits are also good for drilling thin acrylic because
they only have one straight flute, which does a very nice
job of scraping. Enco* carries them at a respectable discount.
|
|
|
|
|
Holesaw
|
Unibits
|
Plastic drill
|
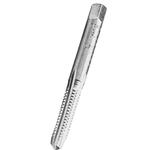
Tapping Acrylic
A tap is used to cut the threads
in a hole for a bolt. Normal taps made for steel may be
used to tap acrylic. Simply drill the proper size hole and
tap it. The tap will have a tapered end, thread it through
the acrylic until the straight part of the tap comes out
the backside of the acrylic. There are taps without a taper
for tapping a blind hole (one which does not go completely
through the acrylic). Taps may be found at most stores that
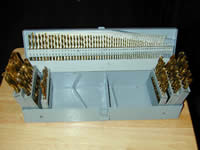
carry tools. Tap drill tables for metal are different than
those used for plastic. Beside normal fractional drill bits,
there are also number bits which run from 1 to 60 and letter
bits that run from A to Z. These drill bit sets can be found
at most online tool stores like Grizzly* if they cannot
be found locally.
Tap Drill Table
|
Screw Size
|
Tap
Drill Size
|
Clearance Hole
Drill Size
|
|
# 0 80
|
3/64"
|
50
|
|
|
|
|
|
#1 - 64
|
#53
|
46
|
|
#1 - 72
|
#53
|
46
|
|
|
|
|
|
#2 - 56
|
#50
|
41
|
|
#2 - 64
|
#50
|
41
|
|
|
|
|
|
#3 - 48
|
#47
|
35
|
|
#3 - 56
|
#45
|
35
|
|
|
|
|
|
#4 - 40
|
#43
|
30
|
|
#4 - 48
|
#42
|
30
|
|
|
|
|
|
#5 - 40
|
#38
|
29
|
|
#5 - 44
|
#37
|
29
|
|
|
|
|
|
#6 - 32
|
#36
|
25
|
|
#6 - 40
|
#33
|
25
|
|
|
|
|
|
#8 - 32
|
#29
|
16
|
|
#8 - 36
|
#29
|
16
|
|
|
|
|
|
#10 - 24
|
#25
|
7
|
|
#10 - 32
|
#21
|
7
|
|
|
|
|
|
#12 - 24
|
#16
|
1
|
|
#12 - 28
|
#14
|
1
|
|
#12 - 32
|
#13
|
1
|
|
|
|
|
|
1/4" - 20
|
#7
|
H
|
|
1/4" - 28
|
#3
|
H
|
|
1/4" - 32
|
7/32"
|
H
|
|
|
|
|
|
5/16" - 18
|
F
|
Q
|
|
5/16" - 24
|
I
|
Q
|
|
5/16" - 32
|
9/32"
|
Q
|
|
|
|
|
|
3/8" - 16
|
5/16"
|
X
|
|
3/8" - 24
|
Q
|
X
|
|
3/8" - 32
|
11/32"
|
X
|
|
|
|
|
|
7/16" - 14
|
U
|
15/32"
|
|
7/16" - 20
|
25/64"
|
15/32"
|
|
7/16" - 28
|
Y
|
15/32"
|
|
|
|
|
|
1/2" - 13
|
27/64"
|
17/32"
|
|
1/2" - 20
|
29/64"
|
17/32"
|
|
1/2" - 28
|
15/32"
|
17/32"
|
Bending Acrylic
There are expensive systems for bending
acrylic, but for low volume work a heat tape should work
just fine. U.S. Plastic* carries heat tapes for bending
acrylic in 24" and 48" lengths that will work
on acrylic of 1/4" thick or less. To bend right angles
in a piece of acrylic make a fixture to form it over. When
the acrylic gets hot enough to bend, it is very soft and
may bend to an undesirable angle without a form. Some people
have luck using a heat gun, but it is very easy to burn
the acrylic.
Finishing Acrylic
Edges
How well the edge of a piece of acrylic
needs to be finished depends on its intended use. If it
is going to be glued, the type of glue being used and if
a clear joint is desired will all affect how the edge will
need to be finished. Flat edges without voids will work
best for solvent cementing. Using the right saw blade to
cut the acrylic will reduce the amount of edge finishing
that will need to be done. Remember to not let the edge
overheat in the finishing process. A router or jointer can
be used to make a rough edge become flat and smooth. U.S.
Plastic* carries an edge scraper, plastic plane and carbide
router bits for acrylic. A variable speed router is helpful
because the cutter speed can be adjusted so it shaves off
thin pieces of acrylic without melting them. Experimenting
with the router and some scrap acrylic will help find the
appropriate bit and feed speed.
|
|
|
|
|
Edge scraper
|
Plastic plane
|
Router bit
|
Gluing Acrylic
to Acrylic
There are many options when it comes
to gluing acrylic. Acrylic cements come in various degrees
of thickness. Water thin cements make very nice joints because
they work into the joint by capillary action, but won't
fill any voids. The thicker cements will fill voids, but
do not flow into a joint as well as the thin cements. To
make thicker cements put acrylic shavings into some thin
cement until it reaches the desired thickness. This mixture
should be sealed and allowed to sit for 24 hours before
using. Pre-thickened cements are also available ready-made.
Always remember to work in a well-ventilated area to avoid
inhalation of vapors and wear gloves to avoid skin contact.
Do not smoke or work around flames as some of the cements
are very flammable. Always read the MSDS (Material Safety
Data Sheet) for the exact cement being used before using
it. Follow the exact cementing procedures of the manufacturer
for the particular type of acrylic being used, because different
types of acrylic have slightly different cementing procedures.
Gluing Acrylic to Glass
Oceanic uses GE Contractors Silicone
SCS 1200 to glue the acrylic corner boxes into glass tanks.
U.S. Plastic* sells SCS 1200 in translucent and assorted
colors in caulking gun sized tubes. The key to a good bond
is for both surfaces to be completely clean, as even one
fingerprint will cause the Silicone not to adhere well to
it, creating a poor bond. Always allow 48 hours for it to
dry and another 7 days to cure completely.
Making Acrylic
Flanges
An acrylic flange is common to
many DIY and production designs, so it is handy to be able
to make them properly. There are two types of flanges: a
tube flange has the same ID as the tube it is attached to,
while a cap flange has the same OD as the tube flange. The
cap flange is used to make a removable cap on a tube. Two
of the tube flanges can be used to attach two tubes together.
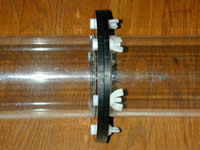
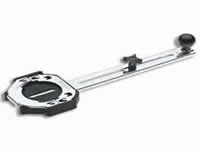
One of the easiest ways to make a flange is with a router
and circle-cutting attachment. Rockler* carries several
different circle-cutting attachments for routers. U.S. Plastic*
and Onsrud* carry straight carbide router bits for acrylic.
If a hole is needed in the center of the flange for a fitting,
or if this is a tube flange, first drill the pilot hole
for the circle-cutting attachment, and cut the OD of the
flange. The piece of acrylic should be fastened down so
it does not move around while the flange is being cut. For
a tube flange, set the circle-cutting attachment to the
flange ID, and cut it. To make a flange cap without a hole
in the center, use the circle-cutting attachment to cut
a circle out of plywood with the OD of the flange. Use the
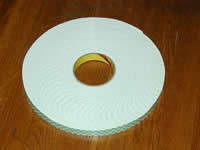
foam type of double-sided tape to attach a piece of acrylic
to the plywood disk. Two short strips of tape should suffice
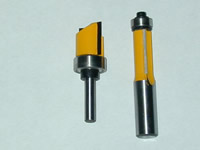
to hold the piece of acrylic to the wood pattern. Use a
pattern-cutting bit and a router to make a copy of the wooden
disk on the acrylic. Pattern-cutting bits are straight-sided,
and come with a bearing on the top or bottom. Drilling the
bolt holes to attach the two halves of the flange together
should be done with care, so that the flanges will easily
line up in any position. To do this, make a paper pattern
of the flange, and draw another circle halfway between the
OD and ID. This will be the bolt circle. Decide on the number
of bolts that will be needed in the flange. Divide the bolt
circle into that number of equal length sections. Make a
copy of this drawing for each flange half. Cut the patterns
out, tape them to the flanges and drill the holes. If one
side of the flange is going to be tapped, be sure to drill
the side that the bolt will pass through with the clearance
hole size bit and the side that will be tapped with the
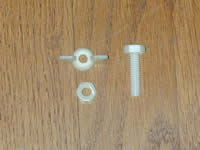
tap drill size bit from the table above. U.S. Plastic* and
Aquatic Eco-Systems* sell nylon bolts, nuts, washers and
wing nuts. Holes that are going to be bolted should have
the edges of both sides of the hole relieved with a zero
flute countersink. JL Industrial* has zero flute countersinks
for $6.
|
|
|
|
|
Tube flange
|
Flange cap
|
Circle cutting attachment
|
|
|
|
|
|
Nylon bolts
|
Foam tape
|
Pattern cutting bits
|
Acrylic is very easy to work with and
can be used to make many useful things for your system.
It is one of the most flexible and reef safe materials available
to work with. Knowing how to work with it is critical. It
is my hope that these tips, coupled with some practice,
will help you succeed in whatever acrylic project you undertake
for your marine aquarium.
* Web links for listed businesses
are in the table below.