|
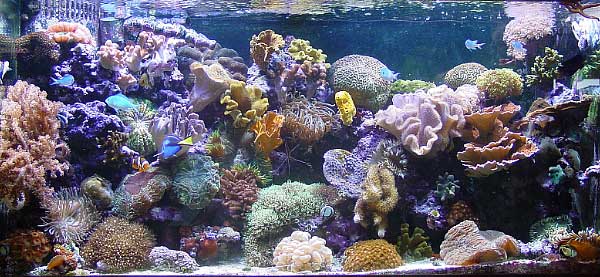
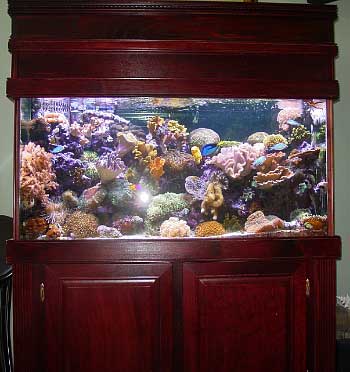
Carl Menard's (cman) Reef Aquarium
Introduction/Background:
I will start by saying how honored I am
to have been chosen by Reefkeeping Magazine as a Tank
of the Month recipient. I've always been amazed by the tanks
that are selected each month and was thrilled to hear that
my tank had been chosen for the month of March.
|
Aquarium
Profile:
|
• 90
gallon AGA glass tank
|
|
• 75
gallon sump/refugium in basement
|
|
• Modern
Series AGA stand
|
|
• Modern
Series AGA canopy, modified for halides
|
|
I guess my introduction to the aquarium
hobby has to be blamed on my wife's purchase of a 2.5-gallon
freshwater tank about eight years ago. Shortly after adding
the obligatory pair of goldfish, I had lost all interest -
that is, until we purchased a 72-gallon bow front tank three
years later. The 72-gallon tank has been a freshwater system
from the start and has a mix of African cichlids. From the
beginning, I was always on a quest for more colorful fish
and I guess that's why I eventually looked into a saltwater
tank.
 |
In December, 2000, I began researching
what would be needed to set up a saltwater tank. Like many
people entering this hobby, I didn't even have a clue as to
what keeping a reef tank was all about. My initial plan was
simply to get a larger tank than what we already had. I settled
on a 90-gallon, and placed some dead coral decorations and
a few colorful fish in it. At this point, that's all I really
had in mind. Live rock, deep sand beds and corals were the
furthest thing from my mind, mostly because I didn't have
any understanding of what they were all about. All I knew
was that I wanted a brightly lit tank with brightly colored
fish.
Initially, I bought a 90-gallon All Glass
Aquarium (AGA) tank, cherry stand, dual strip light and a
20-gallon sump. This seemed like a good place to start. While
spending time in the local fish store, I was beginning to
wonder what those weird (and interesting) looking tanks opposite
the fish section were all about. Little did I know they were
reef tanks, and my attraction to them would lead me down this
path. Within a matter of weeks after setting up the tank,
I decided that I would replace the dead coral with live rock,
starting first with 30 lbs., and shortly thereafter adding
another 70 pounds. Even at this point, my intention was not
to do anything with corals, just fish. After all, what could
I do with only 80 watts of fluorescent lighting over a 24"
deep tank?
 |
I began thinking that if I added a bit
more light, maybe I could introduce some of those low light
corals that I was sure would do well in my tank. So, I added
a 65-watt power compact fluorescent light and my first coral,
a clove polyp. It's now almost three years later and I'm writing
this article.
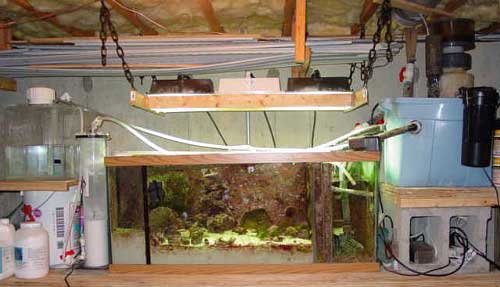
Tank:
The tank is a 90-gallon AGA reef-ready
tank with the Modern Series cherry stand and hood. The overflow
is modified with a Durso standpipe to quiet things down a
bit. Circulation is provided by a Mag 24 return pump and four
Maxijet powerheads controlled by a Red Sea Wavemaster Pro.
A Dremel tool was used to modify and enlarge the top slots
of the built-in overflow in order to run the Mag 24 without
restricting the output too much. Luckily, I have never had
to battle with any type of nuisance algae, and I believe the
significant amount of water flow within the tank has been
a contributing factor to this good fortune.
|
Water
Parameters:
|
·
Calcium: ~410ppm
|
|
·
Alkalinity: 10 dKH
|
|
·
Specific Gravity: ~1.024
|
|
·
Temperature: 78 - 82°F
|
|
· pH:
~8.2
|
|
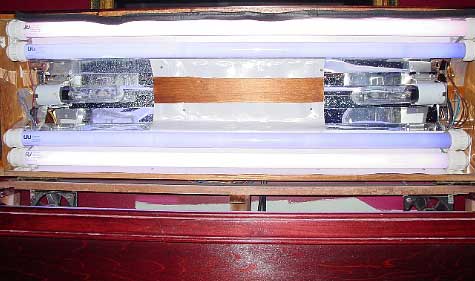
Lighting:
The lighting consists of 440 watts of VHO
fluorescents and a dual 250-watt metal halide setup. The VHO
bulbs are a mix of Super Actinic and Aquasun URI bulbs and
the metal halide lamps are Ushio 10K. They are powered by
a PFO dual ballast with mogul bases… pretty standard
stuff.
Lighting was my biggest challenge, and
in hindsight I would never have bought the canopy that comes
with the Modern Series. It's fine if all you have is a dual
strip light, but because of its construction it becomes impossible
to mount anything longer than a 36" bulb to the underside
of the cover on the canopy.
|
Photoperiod:
|
•
|
10am:
VHOs on |
|
•
|
12pm:
Halides on |
|
•
|
9pm: Halides off |
|
•
|
10pm:
VHOs off |
|
|
I hit this problem six months after initially
setting up the tank when I decided to upgrade from normal
output to VHO bulbs. Because it has a "flap" type
cover that sits inside the frame of the canopy, the clearance
is only 45". I installed four 36" bulbs and staggered
their placement to get a good enough light spread to cover
the entire tank. Roughly six months after squeezing the VHO
bulbs into the hood, I decided to upgrade to metal halides
so I could try my hand at some different corals and also with
the hopes of keeping a clam or two. The only way to mount
the metal halide lights was to abandon the flap that sits
on the canopy and build a new hood to house the lights and
reflectors. I attached this hood to the original canopy, minus
the flap, using door hinges from the local hardware store.
By mounting the new hood onto the original canopy I was able
to keep the metal halide bulbs about 9" off the water
surface. Since I was building the hood from scratch, and seeing
that I had had already made an investment in the VHO ballast,
I decided to add these to the hood so I could use 48"
bulbs. Two 4" fans made by Radio Shack provide cooling
in the canopy, and they are connected to a variable speed
switch that comes on with the metal halides. It's a bit tight
in there, but the inhabitants seem to appreciate all the extra
light.
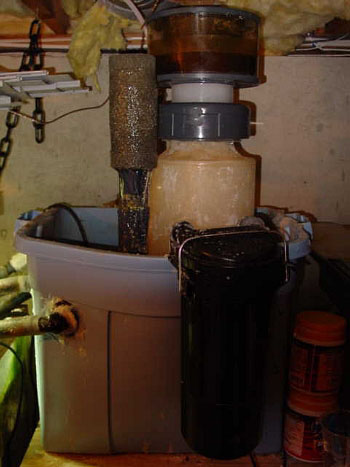
Skimmer:
I think this was the one area that made
the biggest impact on the overall health of my system. I tend
to feed heavily and with the high bio-load of my tank, I could
not see myself experimenting with a skimmerless system. The
first skimmer I bought was a Berlin Turbo in-sump model. I
didn't realize how important this piece of equipment would
be when I ordered my tank, and since I had limited space in
the stand, I went with the Berlin. This was a mistake, as
countless hours were spent modifying and tweaking this skimmer,
and yet I just couldn't get it to produce any significant
amount of skimmate. After installing a new sump/refugium in
the basement, the water volume in my system had basically
doubled, which all but made the Berlin useless. A lot of time
was spent researching the pros and cons of all the various
high-end skimmers on the market, and I ended up buying a EuroReef
CS3-8. One of the deciding factors was that I needed a skimmer
that I could submerge in the sump, and the EuroReef fit the
bill. It has become absolutely, positively the best addition
I've made to the filtration system. After using a Berlin for
the first fifteen months, I basically went from not skimming
at all to using the EuroReef. I couldn't believe how much
gunk this skimmer produced! In its first week of operation,
I probably collected more skimmate than I had during the previous
fifteen months. The simplicity of its design makes it almost
foolproof. Place it in the sump, plug it in, adjust the riser
pipe and watch it skim!
 |
 |
Sump/Refugium:
The sump and refugium was probably the
biggest physical change I've done since intially setting up
the tank. The original configuration included a 20-gallon
long aquarium used as a sump and located in the stand under
the tank. A Mag 7 return pump and Berlin skimmer were installed
in the sump, along with some baffles to cut down on the bubbles
produced by the overflow.
Fours months after setting up the tank
I decided to install a bigger sump and add a refugium at the
same time. Obviously, there was no way to do this in a 4'
stand, so I had to come up with another solution. Luckily,
there was some free space directly below the tank in the basement,
so I decided to clear some room and take over a small section
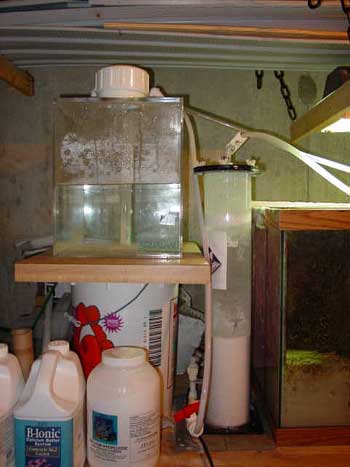
of the basement. The sump/refugium includes three main components:
a 75-gallon glass tank, a 30-gallon Rubbermaid container,
and a 13-gallon Nurce top-off tank.
 |
I bought the 75-gallon tank used for $50
and siliconed Plexiglas panels to the inside, creating a refugium
area and a small compartment for the Mag 24 return pump. The
refugium is in the leftmost part of the sump and takes up
about 75% of the available space. The rightmost part of the
sump houses the main return pump. To the right of the main
sump is the Rubbermaid container that contains the EuroReef
skimmer and three 200-watt Visi-Therm heaters. I have that
part of the system raised above the top of the sump so I could
install a few bulkheads and let gravity do its job spilling
the water into the section of the sump where the return pump
is located. The water flows down from the overflow in the
tank above and then hits a 'Y' adapter, which directs it to
two different areas. The first area is the refugium where
the flow of water is controlled with a ball valve. I estimate
that about 25% of the water flows in this direction - just
enough to not create too much flow through the refugium. It
then travels across the refugium through some baffles and
into the return pump area. The other end of the 'Y' dumps
into the Rubbermaid tub and is skimmed by the EuroReef, eventually
spilling into the same baffles in the return area of the sump.
This is where spending a lot of time on
Reef Central paid off the most. When I decided to move the
sump into the basement, I used a lot of ideas gleaned from
the forums to save money. The Rubbermaid container was $15,
used 75-gallon tank - $50, Lights of America light fixture
from Home Depot - $60 and Southdown sand - $35. Add about
$50 worth of flexible tubing and ball valves and the whole
system cost a little over $200.
What benefits did I see? Well, I basically
doubled the volume of water in my system. This, I think, provides
a more stable system overall. I also gain the benefit of having
half of the water volume in the basement where the temperature
remains a constant 60-65 degrees. With metal halide and VHO
lights generating a lot of heat in the tank above, the cooler
temperature in the basement helps keep the tank temperature
within acceptable ranges. Also, while plumbing the return
and overflow lines into the basement, I ran them through a
few feet of the air conditioning ductwork for the house. During
the summer, when the air conditioning is on, about two degrees
of cooling is achieved by doing this, and I've been able to
avoid needing a chiller.
 |
I think the one of the nicest benefits,
though, of having the basement setup is the ability to work
in an area where you can be a bit sloppy. The trashcan filled
with pre-mixed saltwater for doing water changes was not a
big hit with the wife when it was sitting in the middle of
the family room. I can work on things and can leave them half
done in the basement while the tank above still looks great.
Water changes, which I do every four weeks or so, are simplified
because I connect a line from my sump/refugium to the sewer
line for the house. I typically change about 50 gallons at
a time, and assuming that the water is already mixed, I can
accomplish this in about 15 minutes. Over the years I have
found that the best way to have a consistent water-changing
regimen is to make it as simple as possible.
Water Top-Off and Supplements:
The final part of the basement setup is
the water top-off system. The system evaporates about two
gallons of water per day. I have a 13-gallon Nurce top-off
unit that sits above and to the left of the sump and is filled
once a week from an RO/DI unit, which is installed in an upstairs
laundry area. At first, I relied on water changes to restore
whatever elements had been depleted over time in my system.
As the bio-load increased, I started using B-ionic on a daily
basis to manage calcium and alkalinity. I couldn't keep up
with the demands by using just B-ionic, so I began dripping
kalkwasser. After about six months of mixing kalkwasser every
day, a kalkwasser reactor was added to the Nurce top-off system
and I now only have to add kalkwasser to the reactor every
four or five weeks. Other than that, I run carbon continuously
in a Magnum hang-on canister filter.
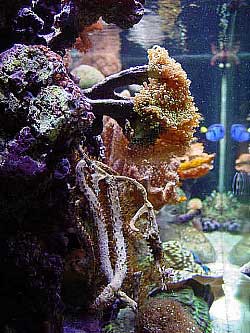
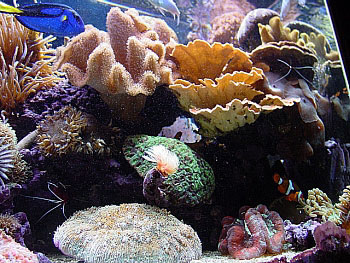
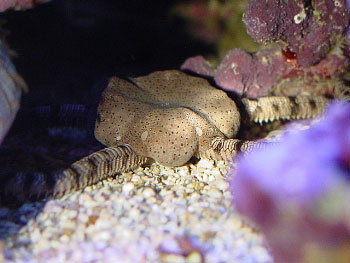
Inhabitants:
As I said at the beginning of this article,
my original intention was to set up a fish-only tank. Over
the years that idea has morphed into what I have today. As
far as corals go, the tank is generally a mixture of LPS,
SPS and soft corals, but tends to lean more heavily toward
the soft corals and LPS. The lack of a lot of SPS is probably
why I have been able to avoid purchasing a calcium reactor.
The fish are fed automatically every morning by an Eheim feeder,
and every other day I feed a mixture of various frozen foods.
Cyclop-Eeze© is fed three or four times a week and everything
(corals, inverts and fish) seems to love this food. Here is
a list of the inhabitants in my tank:
|
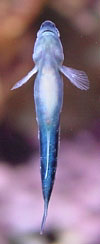
Fish:
|
|
Hippo
tang
|
Neon
goby
|
|
Green Chromis
|
Pajama
cardinal
|
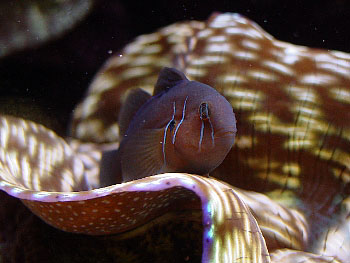
|
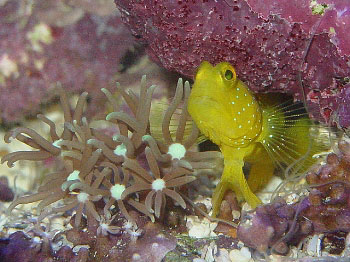
Watchman
goby
|
Citron
goby
|
|
Six-Line
wrasse
|
Royal
Gramma
|
|
Coral
Beauty dwarf angel
|
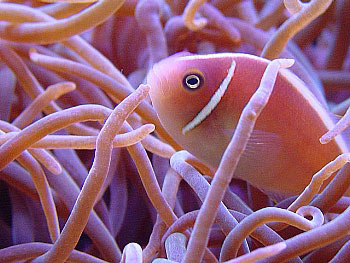
Pink
Skunk clownfish
|
|
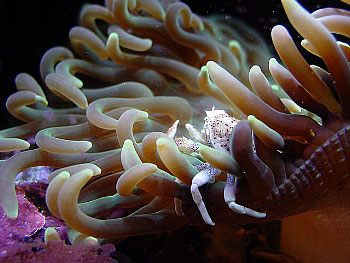
Percula
clownfish (mated pair)
|
|
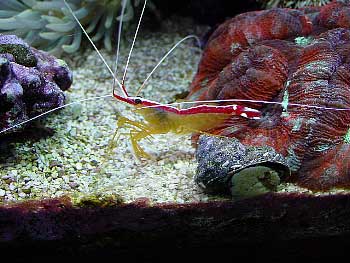
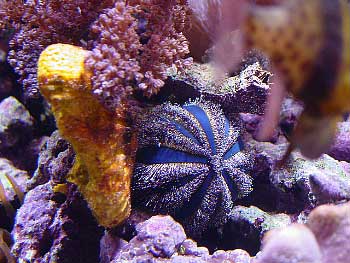
Invertebrates:
|
|
Cleaner
shrimp
|
Blood
shrimp
|
|
Serpent star
|
Tuxedo
urchin
|
|
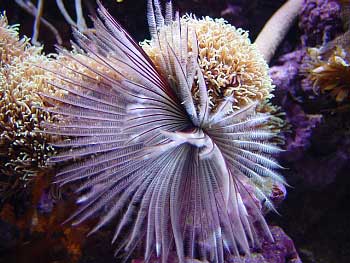
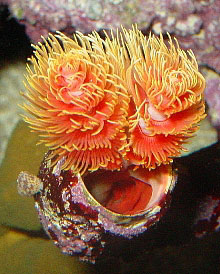
Coco
worm
|
Porcelain
crab
|
|
Hawaiian
feather duster
|
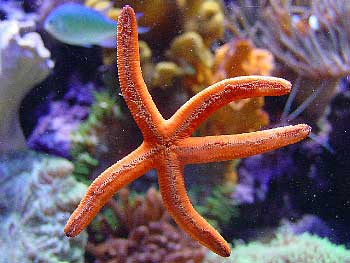
Orange
Linckia starfish
|
|
Bubble-Tip
anemone - hosted by the Pink Skunk clownfish
|
Long
Tentacle anemone - hosted by the pair of Percula clownfish
|
|
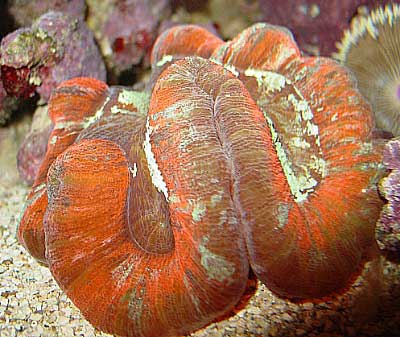
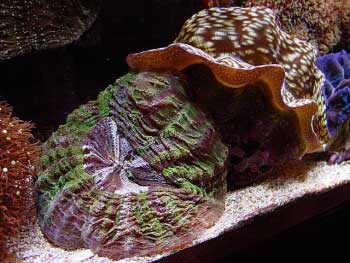
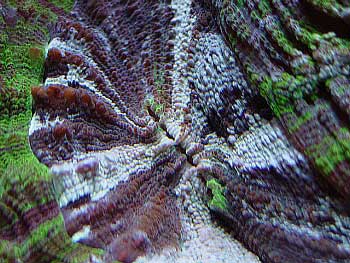
8" Derasa clam
|
6"
Crocea clam
|
|
Astrea
snails
|
Tiger
Trochus snails
|
|
Mexican Turbo snails
|
|
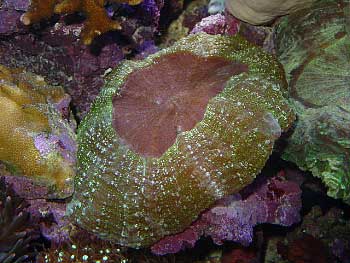
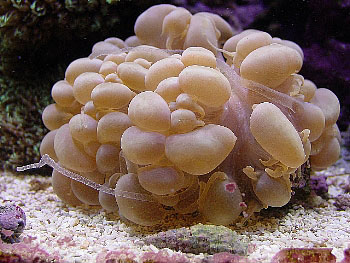
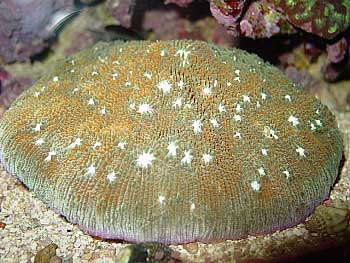
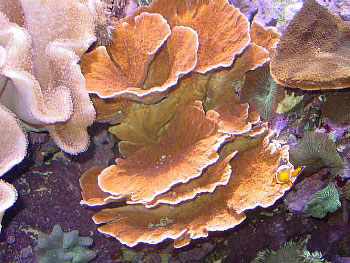
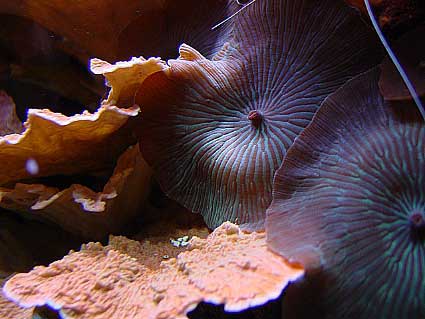
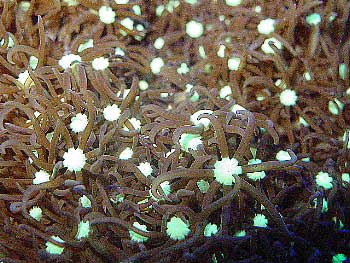
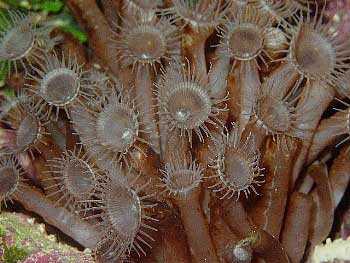
Corals:
|
|
Green
Star polyps
|
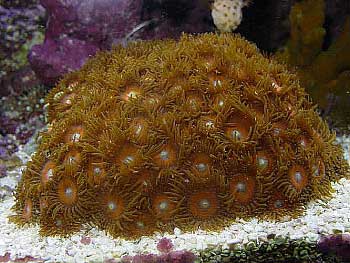
Brown
button polyps
|
|
Yellow Porites
|
Various
leather corals
|
|
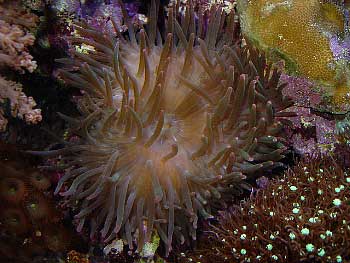
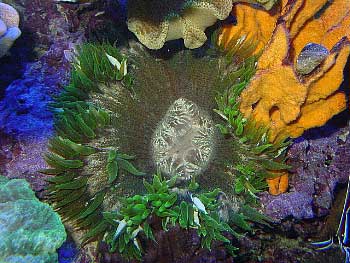
Scolymia
|
Short-tentacle
plate coral
|
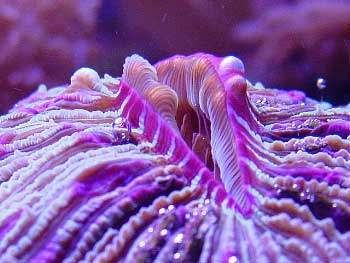
|
Red
open brain coral
|
Green
maze brain coral
|
|
Frogspawn
|
Yellow
scroll coral
|
|
Snake
polyp
|
Red
Lobophyllia
|
|
Green
hairy mushrooms
|
Various
zoanthids
|
|
Montipora
spp.
|
Xenia
|
Conclusion/Acknowledgements:
Well, I guess, like a lot of us here, I'm
addicted to this hobby. I've spent a lot of time over the
last three years getting the tank to look the way it does
now. I'm in no way an expert, but know just enough to be able
enjoy reef keeping and how to keep a healthy tank. One of
the things that amazes me the most is how difficult it can
be to explain exactly what I have sitting in my family room.
No matter how you explain it, or how many pictures you show,
people are just amazed when they finally see it. I guess that's
part of the payback for all the hard work we put into our
tanks.
In conclusion, I'd like to thank a few
people for making this hobby enjoyable to me. Although it's
all too often the local fish stores get unfairly criticized,
I have found that they have been a very valuable resource.
Without some of their guidance, I would have wasted a lot
of money. I'd also like to thank my friends and relatives,
who by showing genuine interest in my tank, have unknowingly
encouraged me to continue to make my tank look as good as
it can. And finally, I want to thank my wife and two children
for putting up with me and this crazy hobby!
Now on to that 500-gallon tank that would
look fantastic in the family room…
Feel free to comment or
ask questions about my tank in the Tank of the Month thread
on Reef Central.
|