

|
|

Do It Yourself – Adding a pH Probe Holder to a Calcium ReactorBy Tim Reed (timthetoolman)
A calcium reactor provides liquid calcium and alkalinity to a reef tank around the clock. The effluent (the liquid exiting the reactor) is one way to measure how the reactor is working. A better option is a way to measure the pH within the reactor itself, to determine and set the proper pH level needed to dissolve the aragonite-based media. My own calcium reactor lacked this necessary port, and after researching my options, I decided it would make a nice DIY project. I thought I would share my procedure because drilling and tapping acrylic is scary business. Parts and ToolsTools used:
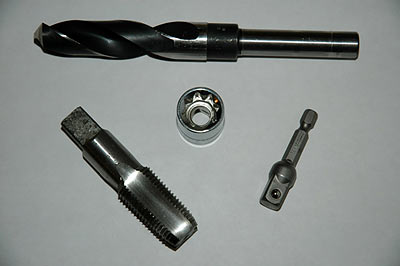
Parts and Resources
I suggest getting a tap handle that fits the tap instead of my method of using the drill press to start the tap though. First you must know the units that we are using are National Pipe Taper (NPT) or some call it National Pipe Thread. If you buy a 1/2" bolt thread it's going to be way smaller that the 1/2" NPT bit. All of the fittings in the plumbing department are going to be NPT threads. You will generally have a smaller drill bit than the tap itself so here's a drill guide for NPT tap and drill sizes. When working with acrylic and power tools always wear safety glasses, a face shield is better, and a long sleeve shirt with gloves. When drilling acrylic it's the last 2 mm that usually bind the drill bit and the piece your drilling starts swinging around and if it breaks it could produce some sharp edges that can cut almost as easy as glass or 'you'll shoot your eye out' if pieces break loose and explode towards your face. Remove the reactor lid and the hosesTake a picture of how your reactor is set up before you start to disassemble your reactor so you know where everything goes when you put it back together. Take off the lid and look at the other fittings on the lid before you mark the location that you want your probe to go and stay within the same distance away from the center as the other outlets and inlets or you might put your probe holder too far out which will put it on the ring where the gasket goes and the lid may not go back on. Now scribe a mark where the center of the hole will be. Drilling the LidThe most import part of drilling acrylic is you must secure the piece to prevent vertical and horizontal movement. To do this I use a piece of lumber to hold it down. I drill a hole in a 2x4 that's larger than my drill bit so I can still be able to see what I'm drilling. Place a piece of sacrificial wood under the acrylic to keep from drilling through your table. Place the acrylic on the table. I then clamp the lumber over the acrylic to secure it to my drill press. Next I install the drill bit in the drill press that I'm going to use to make the initial hole in the lid. Make sure you get the drill bit that goes with the tap you are using. Some taps list the drill bit to use on the side by the size but if not you'll have to look it up in the link above. Next I turn the drill on and barely tap the acrylic to leave a mark so I can see if it lines up with the mark I put on the lid earlier. You may have to remove the drill bit and use a mirror to see in the hole to see if everything lines up. 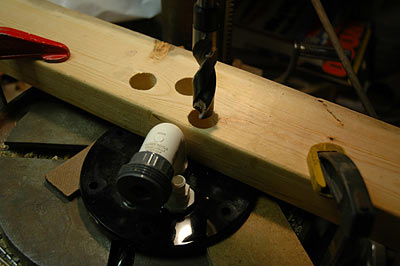
When drilling use tapping motions. If you just bore down on the acrylic with the drill or the bit is not sharp the acrylic will heat up and start melting. Go slow. You may want to use an air compressor line and blow out the particles when they build up. When you're through the acrylic you'll start to see bits of your sacrificial wood come through the hole. The brown bits of wood in this photo came from the piece of wafer board I used behind the acrylic lid. I usually try to use wafer board rough side up to prevent the acrylic piece from sliding. (Editor's note: A sharp paddle bit will drill through nicely.) 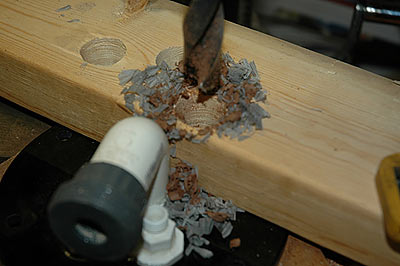
Here's the piece after drilling. I left the wafer bits in there so it shows up better. 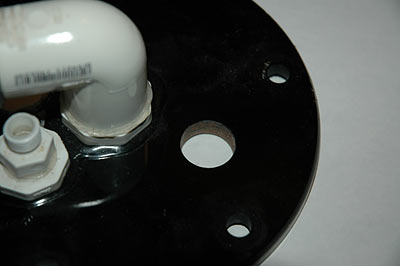
Tapping the LidThis is the difficult part, getting the tap in straight. Like I said before, I use a socket adapter for a drill and attach the appropriate 8-point bit. This next part is a little dangerous and I don't advocate it's use, it's just how I do it, you should use the right tools such as a T handle. I chuck the adapter up in my drill press and set it to the slowest RPM. It helps to have 2 people for this because I can hold the piece and insure it is perpendicular to the acrylic and my helper momentarily turns on the drill press and back off. This is just to get the tap started straight. 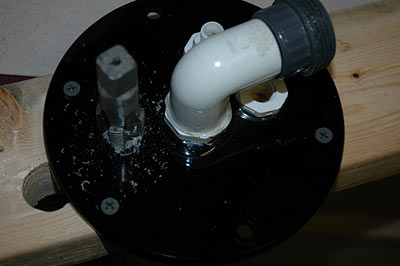
If you start the thread and you are no more than 1 or 2 turns in and you see it's going in at an angle just back it out and start over. You don't want to get a quarter of the way through and then try to start over. The tap is tapered and it can be done but as long as it's not more than 2 degrees I wouldn't start over. I also recommend checking the fit of the probe holder in the hole because the holder may be a bit smaller than the tap. Once it's started straight I used a socket wrench to finish...again use the T bar that is made for this so you don't apply too much pressure on one side. I've done enough thread cutting to know how to apply the pressure but it's hard (also I forgot to get a T handle that big). Note in the photo above that I mounted the lid to the board with the tap over the hole I drilled so I can brace it for leverage. Get as many screws in the lid mounting holes as you can and snug them down but not tight or it will break. Clean It UpInstall the probe adapter and measure how far it installs into the chamber because you want to cut the excess off so it doesn't cause water to be diverted past the probe and so you can have as little of the probe body in the reactor to expose the element. 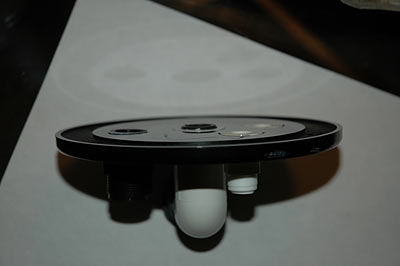
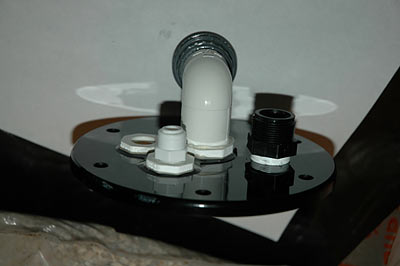
You're done, you can install the probe and lid and hook everything back up. 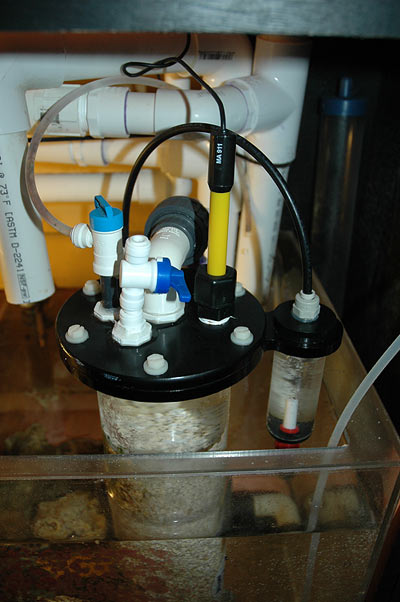
Alternatives AboundI ended up having to do this a second time for another calcium reactor, and came up with some better methods. Maybe these images will make the project easier for you. This lid was acrylic instead of the plastic one mine was made of. Some chipping occurred but it wasn't as bad as I though it might be. I mounted this one on the board with the pre-drilled holes (used to hold the lid to the reactor) and clamped it to the table so it wouldn't move. 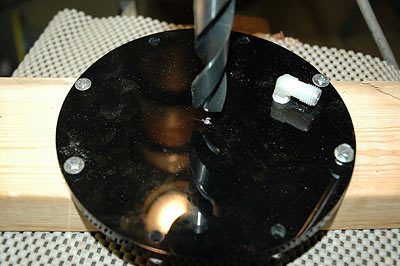
I've gone all of the way through the lid into one of the holes that I lined up but I didn't move it so I could use the drill press to drive the tap in as well...yes, I had a face shield on! This looks like it is offset but it's an optical illusion. 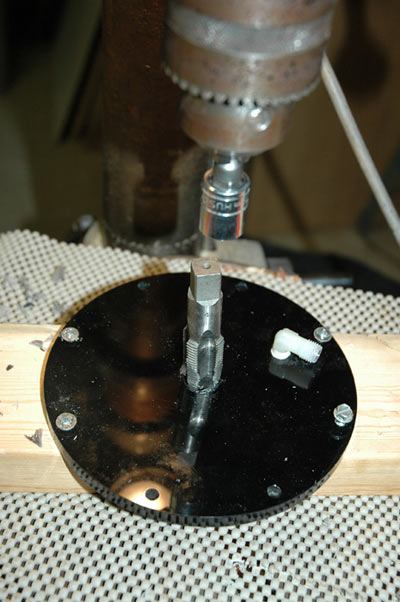
I came up with a new way to cut the probe holder to length. Mount it in the lid first, score it to the length I want to cut off, and then mounted it in a board and slid it through the band saw. 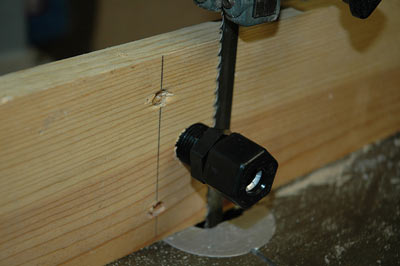
An improvement on this will be to use a thinner material (the thickness of the lid), like scrap aluminum if you have it handy. Insert the piece so that the part you want to cut off is exposed, then cut and sand it smooth. Give it a bath in dishwashing liquid to remove the vaseline or any other oils and wipe it down well. Optional ReadingA Guide to Using Calcium Reactors If you have any questions or comments about this article, please visit this thread in the Do It Yourself forum on Reef Central. |
|
|
|
|