|
Propagating Euphyllia sp.
(Frogspawn)
Introduction
As an aquarist having
nano tanks only, I have to be selective about what corals
are stocked in my tanks as the wrong selection can easily
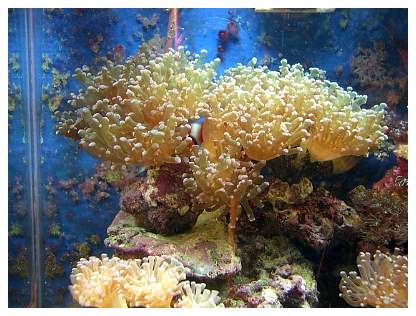
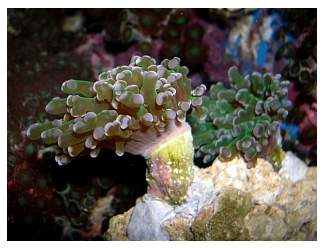
outgrow the space available. In the case of the branching
Euphyllia in my tank this results in crowding and stunted
growth of the shaded branches. Although it's not visible in
this picture below, two branches located at the back of the
right colony have grown up against the glass and are not extending
their polyps as much as the rest of the colony. If the branches
are allowed to remain in a compromised situation, there's
a real risk of infection that can spread to the entire colony.
Even in large tanks, overgrowth of certain corals sometimes
needs to be limited. Using the proper technique, one can fragment
(frag) their Euphyllia, end up with a healthier specimen
and have corals to trade or sell to other reef enthusiasts.
Get Your Tools Together
The first thing you need to do is
prepare the tools. I use the lid of a plastic tub as a work
surface. It's waterproof, contains any spills and is easily
cleaned. When I first fragmented a branching Euphyllia,
I would just cut them off with a wire cutter. Although this
sometimes works, there's the very real possibility of cracking
the skeleton lengthwise. While the coral can usually survive
this trauma I decided it wasn't worth the risk of losing the
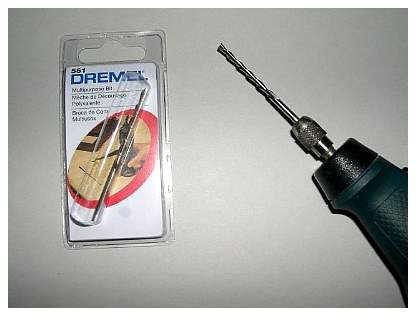
coral. My next tool was the "Dremel" type rotary
cutter with the blade as shown in the picture.
Although this works, access is needed to cut sideways,
and this was difficult in tight quarters. In my case the wheel
usually broke before the cut was finished. I've since gone
to using a Dremel Multipurpose Bit #561. Before using it on
live coral I suggest practicing with dead coral skeletons
or even small pieces of wood to get a feel for how it cuts.
When using any power tool always wear protective eyewear.
 |
|
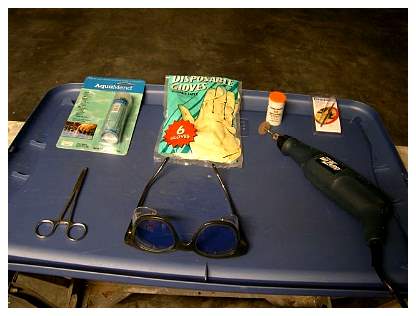
Top row (left to right): epoxy putty, protective
gloves, Dremel rotary bit and Dremel tool and the #561
bit.
Bottom row: hemostats and protective glasses
- all laid out on the plastic container lid used as
a working surface.
|
|
My favorite tool for cutting Euphyllia, a Dremel
Multipurpose Bit #561.
|
Another useful tool is a hemostat. While the hemostat isn't
absolutely necessary, I find it to be very useful, especially
if the fragment has a small skeletal base that's difficult
to handle while mounting. The use of gloves when working with
epoxy was covered in last month's fragmenting article by Greg
Hiller, and I'll refer you back to that
article for further information.
|
Don't be afraid to start.
|
Hack up the Coral
Before removing any large-polyped
coral from your tank it's a good idea for its polyps to be
retracted, otherwise the weight of the inflated polyps can
damage the coral by stretching its tissue. Working with the
coral either before or after lights out would be ideal because
the polyps are usually already retracted. Otherwise, the coral
can be picked up and gently swished around in the tank water
until the irritation causes the coral to close. The coral
is then transferred to a container of tank water until you're
ready to begin fragmenting. I usually do a water change prior
to fragmenting so the coral is kept in the aged tank water
to minimize stress.
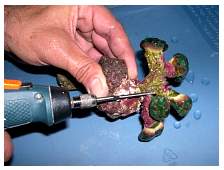
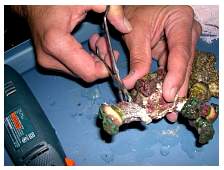
The actual fragmenting process is quite simple - turn on
the Dremel and cut off the branches you want to remove. Try
to cut in such a way to maximize the available skeleton on
the fragment. In the picture below you'll notice the tool
is held so that splatter flies down onto the plastic and not
up into the aquarist's face. I'll also caution that care should
be taken in holding the coral; unlike a piece of lumber, it's
difficult to clamp down a coral, so make sure you have a secure
grip that will not damage the coral's skeleton.
|
Use
steady, even pressure - don't force the tool.
|
Reposition
the coral, if necessary, to get a clean cut
|
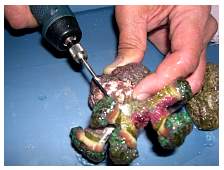
When
the frag is almost completely cut I use the hemostat
to snap it off. This prevents possible damage when it
comes off and hits the work surface.
|
Although most any rock will work for mounting fragments,
with Euphyllia I prefer to hand pick a piece of rubble.
It has to be porous enough so I can easily make or enlarge
a hole in the rock and large enough to support a healthy growing
specimen. Typically, branching large-polyped stony coral fragments
tend to be top-heavy, and piling up epoxy around its base
isn't always as effective or attractive as mounting it firmly
within a hole in the rock. In addition, they're usually fast
growing corals with heavy skeletons; a small piece of rock
may work as a good base for a couple of months, but you'll
end up re-attaching it to a larger rock or find it face down
in the sand one day as the coral grows and expands.
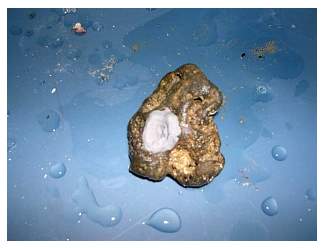
The first step is to grind out the hole(s) in the rock you've
chosen. Although I use a hemostat, any tool will work. Next,
the epoxy putty is kneaded until uniform in color, and a small
piece is placed into the hole. You don't want to fill the
hole completely because room is needed to place the skeleton.
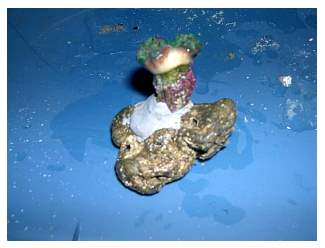
The hemostat comes in really handy for holding the coral during
this step because as the fragment is inserted into the hole
there's really not much to grab a hold of. Once the fragment
is firmly in the hole, reinforce with epoxy around the skeleton
as necessary until the fragment is secure.
|
The hole is filled with epoxy.
|
The fragment is mounted.
|
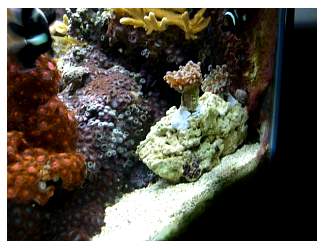
Be careful handling the fragment when returning it to your
tank - epoxy really needs to cure for a few hours to create
a secure bond. Euphyllia typically prefer low to medium
water flow, and this should also be the environment to place
the fragments in when returning them to the display.
|
The finished product seen here a day later; note the
fragment is returning to normal and is beginning to
expand its polyps.
|
I still remember the first time a fellow aquarist gave me
a captive-propagated coral fragment. The concept of raising
and propagating my own corals opened to me a whole new outlook
on the hobby. No longer did I need to spend serious money
purchasing wild-collected corals. Stocking my tank did not
have to deplete both the ocean's resources or my own financial
resources.
It is at first daunting and intimidating to take a power
tool to your prized coral. With the proper technique and tools
it's not really that difficult or dangerous to the health
of the coral, and in some situations it can result in a healthier
specimen.
Happy Fragging!
If you have any questions
about this article, please visit my author forum
on Reef Central.
|