 2009
2009  August 2009
  Tank of the Month
Stats:
 | Today | 930 |
 | Yesterday | 2498 |
 | This week | 12714 |
 | Last week | 41424 |
 | This month | 147407 |
 | Last month | 217210 |
 | All days | 31677091 |
Your IP: 18.227.46.43
Mozilla 5.0,
Today: Jul 27, 2024
Tank of the Month
John Salituro's (johns) Reef Aquarium |
 |
Introduction and Background
What an honor and a thrill it is to have been invited to be featured as Reefkeeping Magazine’s Tank of the Month! Although it sounds like a cliché, I must say that, when I received the notice that my tank had been selected as Tank of the Month, I was extremely surprised.
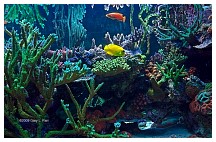
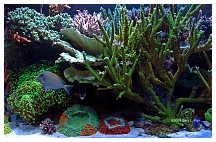
My name is John Salituro, and I have been very interested in reefkeeping for about six years now, including almost a year I spent simply reading and asking as many questions as I could think of before making any purchases. The first reef I set up was more than five years ago using a 75-gallon reef-ready Oceanic tank. I fabricated a 30-gallon sump for it to house a small skimmer, refugium and return pump. Over time, I installed a Kalkwasser reactor and then a dosing pump to add two-part solutions to keep calcium and alkalinity levels in check.
 |
 |
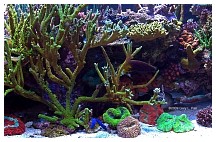 |
Soon, that tank was thriving and becoming quite over-grown, prompting me to start a second, shallow grow-out tank system. This consisted of a custom-made, reef-ready acrylic 70-gallon tank (48”L x 24”W x 14”H) with a 50-gallon acrylic sump. Keeping both systems running separately became a little too much for me to handle. So, not too long after starting that second tank, I made plans to build a larger, single, multi-tank system.
|
|
The Current System
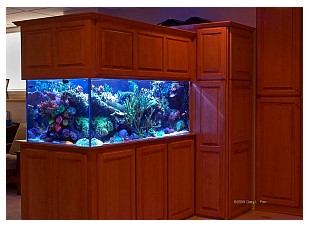
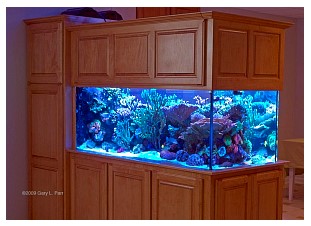
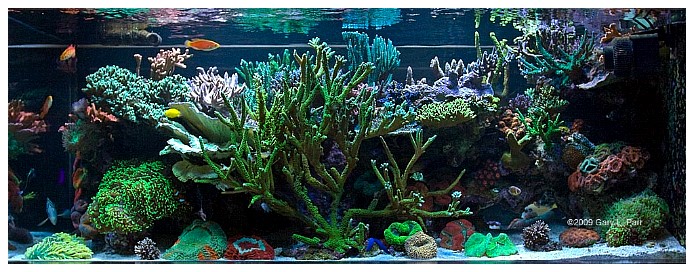
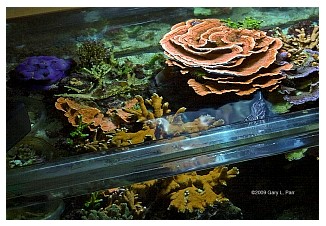
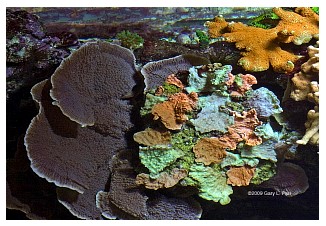
The resulting system has been running for about two-and-a-half years. It consists of a 190-gallon peninsula-style tank, custom-made by Miracles in Glass in Toronto. The dimensions are roughly 60”L x 30”W x 24”H. The tank has perimeter-style euro-bracing and the three viewable sides are Starphire® glass. An external overflow was attached to the non-viewable end to keep it out of sight from the main display. The tank was started with approximately 180 pounds of live rock. The sand bed is one-and-a-half inches deep, composed of seafloor-grade sand.
 |
 |
One of my requirements for this system was that the tank’s external equipment could not be visible from the finished living area of our basement, where the tank is located. However, when my wife and I built our current home, I didn’t know I would be so involved in this hobby. Thus, I don’t have a fish room to house all of the equipment needed to run the system. The solution was to design, with the help of some of my local reefkeeping friends, a custom stand, canopy and some additional cabinetry, which were built by a local custom cabinet builder. The stand and cabinet worked out well but require that the available space be used very efficiently.
|
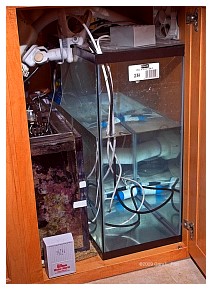
Fortunately, I was able to incorporate the two acrylic tanks from my previous grow-out system into the current setup. The 50-gallon sump from that system sits in the cabinet behind the tank and houses the drains, heaters and filtration equipment. The 70-gallon shallow grow-out tank is in place underneath the main display inside the stand. This brings the total system volume to a little less than 300 gallons.
|
|
The grow-out tank also has a 1½” sand bed and about another 100 pounds of live rock. The entire system was plumbed together by drilling the sides of both acrylic tanks so that they could be connected through the cabinet with two-inch spa flex line. The original drilled overflow in the grow-out tank was sealed so a submersible return pump could be placed in the internal overflow box of that tank.
| System Profile: |
|
Filtration and Water Quality
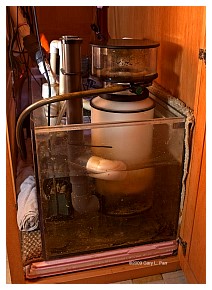
As mentioned, the entire system is relatively compact. The external overflow on the non-viewable end of the tank has been set into a cutout made in the cabinet that is positioned behind the tank. This drains into the acrylic sump below it through two 1” spa-flex drain lines.
Water from the outputs flows simultaneously into a skimmer compartment, which houses an Octopus Pro 300 in-sump skimmer and also a refugium compartment where I grow Chaetomorpha using a 70-watt metal-halide JBJ Viper clamp-on light. From there, the water flows through bubble-trap baffles, into the final sump compartment where I use a PhosBan® reactor containing carbon and phosphate-removing media. Water from this last sump compartment then flows into the grow-out tank under the stand through 2” bulkhead holes and a spa-flex line connecting the two tanks. In the grow-out tank, water finally flows into the sealed overflow box where an Eheim 1262 return pump is located.
 |
 |
Water Circulation and Flow
The vast majority of the flow in the display tank comes from two Tunze® 6100 Streams and two 6055 Nano Streams, located in the non-viewable end of the tank. They are pointed at slight opposing angles and controlled by a Tunze® Multicontroller 7095. Additionally, the Eheim 1262 return pump in the grow-out tank is plumbed back up through the external overflow using 1” tubing. The return line runs along one side-length of the tank’s perimeter bracing and discharges water at the tank’s front viewable side. The output is connected to a Wavy Sea oscillating return device. Because I did not want any visible pumps on the viewable end, this provides randomized flow that points back toward the opposite end of the tank. In the grow-out tank below the display, two Hydor® Koralia 4 powerheads are used.
Lighting
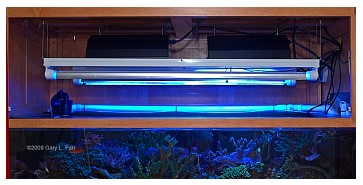
Lighting is one aspect of the tank that is an ongoing experiment. The lighting configuration has changed several times, even in the short two-and-a-half years it has been up and running. I have tried T5-only lighting, as well as various combinations of 250-watt double-ended (DE) metal halide (MH) or 250/400-watt single-ended (SE) metal halide lighting, supplemented with T5s. The list of bulbs I have tried with these various combinations includes Phoenix 14K, XM 10K, and ReefLux 10K for the 250-watt DE MH, and Radium 20K and Aquaconnect 14K for the 250-watt and 400-watt SE metal halides. The 54-watt T5 bulbs I have used for the most extensive time periods have been ATI Blue Plus, either alone or in combination with ATI True Actinic.
|
My current lighting configuration in the main display consists of two 400-watt SE MH bulbs in Sunlight Supply® Lumenmax II pendants driven by 400-watt Sunlight Supply® Galaxy ballasts, along with four 54-watt T5 bulbs for supplementation. Most of the pictures shown in this article were taken under 400-watt SE Radium bulbs and four 54-watt ATI Blue Plus bulbs. The grow-out tank inside the stand uses a single Sunlight Supply® Lumenmax III pendant with a 250-watt DE Phoenix bulb driven by a Sunlight Supply® HQI ballast.
I run the reef tank using a split photoperiod for the metal-halide lighting. This idea originally started in my previous 75-gallon reef as a way of decreasing the amount of heat entering the system. It worked fine for that tank, so I have kept the same concept going for the current system. I use only a total of six hours of metal-halide lighting daily, split into three-hour segments, with two hours of T5-only downtime in between. T5 lighting is used for nine hours daily. The metal-halide lighting used on the grow-out tank is set for a sort of reverse-lighting schedule.
|
Photoperiod
|
Calcium/Alkalinity/Magnesium Dosing
One of the more unique aspects of my system is that, given its size and a bioload dominated by small-polyped Scleractinian corals (SPS), most of the tank’s calcium, alkaline buffer and magnesium demands are still met by dosing chemical solutions, without the use of a calcium reactor. I follow Randy Holmes-Farley’s do-it-yourself supplementation system found here.
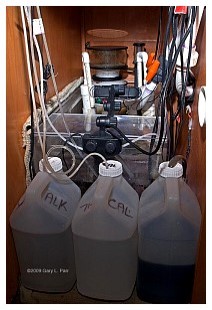
I have a dual-dosing pump that I had been using on my first reef tank to make the job easier. The doser has independent controls for each pump, and I have set it to add calculated amounts of calcium and alkaline solutions every 30 minutes throughout the day. I have the two pumps offset by about 15 minutes so as to not add both solutions at the same time. The solutions are kept in two-and-a-half gallon containers next to the sump in the cabinet behind the tank.
When I first installed this system, I fully expected to eventually have to switch over to a calcium reactor. However, with the other expenses involved in setting up the new system, I put it on the back burner and decided to use my old dosing pump while I concentrated on the skimmer, water circulation and control equipment upgrades, which I felt needed more attention.
 |
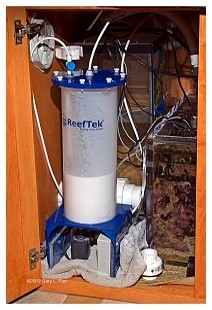 |
Somewhere along the way, I did find a used calcium reactor in excellent condition, and purchased it, expecting to eventually try it out. A year passed by, and the corals were looking very good and really starting to take off. Today, 18 months later, I still can’t bring myself to change what has been working so well. Admittedly, I use extremely large quantities of the two-part solutions to keep the levels in range. Buying and making the chemicals in bulk has helped with the added work and expense involved in using these solutions. Magnesium is also added to the tank regularly, using a solution of magnesium chloride and magnesium sulfate (Epsom salts). This is the only chemical solution that is manually added to the tank, usually three to four times a week.
Additional calcium and alkaline buffer are added to the tank using a Kalkwasser reactor in line with the auto top-off system. All of the water evaporating from the tank (roughly three to four gallons/day) is replaced with a saturated kalk solution from the reactor. In addition to adding a little bit more of the calcium and buffer that the tank needs, I feel this helps to slightly raise and stabilize the system’s pH. The Kalkwasser reactor, as well as the 20-gallon RO/DI filtration system’s reservoir tank that feeds the auto top-off (ATO), are both located under the stand, next to the grow-out tank.
Auto Top-Off
To keep a consistent water level in the system, I use two Tunze® Osmolator ATOs. By setting the water level sensor of one of these about a half-inch lower than the other, it essentially acts as a back-up to the primary. My reason for wanting a back-up ATO for this system is due to the small capacity of the section housing the return pump. Because the return pump sits in what was once the overflow box of the grow-out tank, the water volume in this section is fairly small, at roughly three to four gallons. Considering the evaporation rate, this amount of water reserve would only last about a day should an ATO fail for any reason.
I liked the accuracy of the Tunze® Osmolator so much I decided to use the same model for the back-up unit. The primary ATO, in use more than 90% of the time, is directed to the kalk reactor, so that the normal evaporation is replaced by a saturated kalk solution. The back-up ATO bypasses the kalk reactor and pumps straight from the RO/DI reserve tank. This set-up has the added benefit of allowing a little more control with pH and dosing parameters. For instance, if larger volumes of water happen to get removed from the tank, both ATO pumps will kick in simultaneously so as to not add too much saturated kalk all at once. Additionally, if the pH of the tank should spike for whatever reason, e.g., due to too much kalk addition, the primary ATO pump can be turned off using a controller, while still allowing the secondary ATO to keep water levels consistent using only RO/DI water for a short time while the pH stabilizes.
Heating/Cooling and Ventilation
As you may know, the Wisconsin climate is fairly extreme, with days of intense cold in the winter, and summers that are normally very warm and humid. Having my entire system located in the finished basement of our home has helped a little with temperature issues, as the basement conditions tend to stay a little more stable than the rest of the house. I use two 250-watt heaters, located in the sump, to help control the system’s temperature. However, rather than fight ambient temperatures, I tend to keep the tank temperature moving very slowly as the climate changes, so the temperature in the tank might average around 76° F in the winter and about 80° F in the summer. By changing the temperature set points on the controller a few tenths of a degree every month or so, I keep the changes pretty gradual. In addition, a clip-on fan is positioned to blow across the grow-out tank’s water surface to provide some evaporative cooling. In this way, I can keep the temperature fluctuations within about a degree on any given day.
I have four computer fans wired in the system to help with ventilation. Two fans draw air out from under the stand where the grow-out tank is located and blow it into the sump area. Two more fans blow air from this sump area across the T5 lighting fixtures positioned above the main display to help keep them cool. The canopy’s top is open so that air can simply escape upward. A conventional household ventilation fan is positioned directly above the tank to direct some of this hot, humid air outside the home. It’s not an ultimate solution to humidity problems, but I find that it helps somewhat.
System Control
To automate and control the system as much as possible, I use a Neptune Aquacontroller 3, connected to the Internet through an Ethernet converter. It controls my lighting, heating and evaporative cooling, the kalk stirrer and auto top-off pump, the Tunze® streams, powerheads, return pump and the skimmer. The majority of the system’s equipment is plugged into the controller, if only to provide remote control access.
I also like the ability to turn certain pumps or pieces of equipment on or off from the controller for various types of feeding cycles and/or general maintenance. Additionally, it allows me to add some “insurance” lines of programming to the Aquacontroller 3, such as turning kalk addition off when the pH spikes too high or sending emails or text messages to my cell phone if temperature or pH varies beyond some preset parameters.
Maintenance
I change 25 to 30 gallons of saltwater in this system every two weeks. At the same time, I clean out the skimmer cup and take care of any other pressing cleaning tasks. Normally, one or two days after a water change, I check the calcium and alkalinity levels. If anything seems slightly out of balance, I adjust levels a bit or change the parameters on the dosing pump to help bring levels back in check. Other maintenance that is done manually as needed includes cleaning the glass every few days, re-filling the RO/DI reservoir tank every four or five days, emptying the skimmer waste jug, re-making and/or re-filling the calcium, alkalinity and magnesium solutions I use, adding kalk powder to the reactor, and taking apart and cleaning the pumps.
|
Water Parameters:
|
Feedings and Other Additives
I feed the tanks a variety of frozen foods once a day in the late evening. I tend to feed heavily for this feeding. To diversify a little, I use a combination of chopped nori along with chunks of two or three frozen foods from the following: Mysis, spirulina brine, plankton, blood worms, Cyclop-Eeze®, fish roe, prawn eggs and one or two others I usually have around to try. Every other day or so, I’ll soak these food combos briefly in Selcon™ and/or garlic extract. When I feel like giving the pink-tail triggerfish in the grow-out tank a treat, I’ll throw in some larger krill. Because the grow-out tank is on a reverse lighting schedule, I like to feed several fish that I keep in that tank once more in the very early hours. I use an auto-feeder, loaded with a variety of flake and pellet foods, for the second feeding on that tank.
To feed the corals, once or twice a week I throw in some combination of Cyclop-Eeze®, reef plankton, rotifers, fish roe and prawn eggs. After letting the circulation pumps disperse the food throughout the tank, all of the tank’s pumps are shut off for 20 to 30 minutes, allowing the foods time to settle.
I have tried experimenting a little bit with a variety of other additives, mostly in the form of some carbon dosing or using a few different brands of amino acids and/or coral foods in moderation. I can’t say for certain that these other additives have done anything strikingly positive or negative to the tank’s inhabitants because, more often than not, other parameters of the tank are changing at the same time as these things are being added. However, it seems in theory that the use of some of these additives might be somewhat beneficial. Not knowing for certain, I tend not to overdo it with any one thing.
Tank Inhabitants—Fish
The tank is admittedly somewhat overstocked with fish. Perhaps I have gotten away with this by having a wider tank with a lot of open rockwork, providing a lot of room for the fish to swim, graze and find comfortable territories. Keep in mind, the list of fish below is divided somewhat between the display and the grow-out tank.
Fish
|
Pink Skunk clownfish pair (A. perideraion) |
Red Sea Sailfin tang (Z. desjardini) |
|
(2) Tail Spot blennies (E. stigmatura) |
Lieutenant tang (A. tennentii) |
|
Bundoon blenny (M. bundoon) |
Yellow Mimic tang (A. pyroferus) |
|
Pink Bar goby/Tiger Pistol shrimp pair (C. aurora/A. bellulus) |
Twin-Spot Bristletooth tang (C. binotatus) |
|
Firefish goby (N. magnifica) |
Dussumieri tang (A. dussumieri) |
|
(2) Indigo dottybacks (P. fridmani x P. sankeyi) |
Hawaiian Flame wrasse trio (C. jordani) |
|
Fridmani dottyback (P. fridmani) |
Radiant wrasse (H. iridis) |
|
Spotted Mandarin goby (S. picturatus) |
Melanurus wrasse (H. melanurus) |
|
*Pink-Tail triggerfish (M. vidua) |
Yellow Coris wrasse (H. chrysus) |
|
*Purple tang (Z. xanthurum) |
Potters wrasse (M. geoffroyi) |
|
*Indian Gold Ring Bristletooth tang (C. truncatus) |
Blue Star Leopard wrasse (M. bipartitus) |
|
*Orange Skunk clownfish pair (A. sandarcinos) |
Pygmy Possum wrasse (W. albofasciata) |
|
*Klein’s butterflyfish (C. kleini) |
Red Arrowhead Possum wrasse (W. nigropinnata) |
|
*Dwarf Golden angelfish (C. aurantius) |
Breeding Percula clownfish pair (A. percula) |
|
* in grow-out tank |
Breeding Bangaii cardinal pair (P. kauderni) |
Tank Inhabitants—SPS Corals
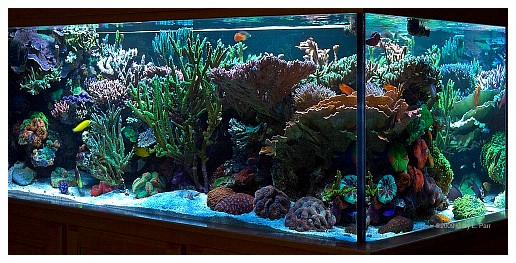
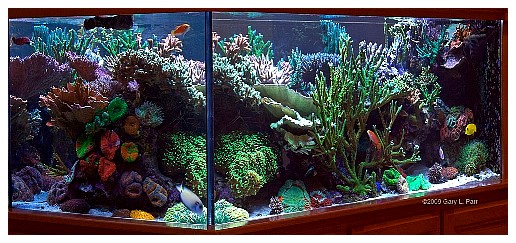
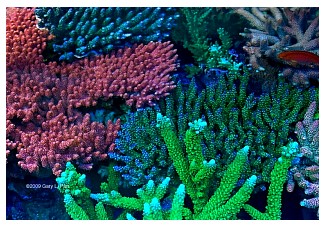
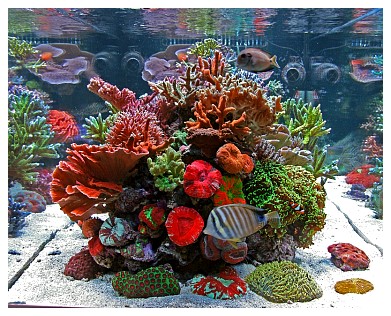
The display tank is heavily dominated by SPS corals, roughly 90% of which I grew from fragments purchased online or obtained from local reefkeepers. The majority of the SPS pieces that I have are corals that I began growing in my first 75-gallon reef tank, so some of these corals have been in my care for about six years.
 |
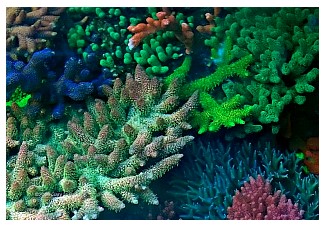 |
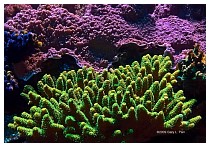
Although there are numerous SPS colonies placed in close proximity to one another, my personal philosophy is simply to leave them alone, allowing them to grow as much as possible. When the corals begin to touch one another, I try to monitor them for a while to see what happens. At times, the corals simply grow into or on top of one another. If that is the case, I leave them alone. If it looks, instead, like some serious damage is starting to occur, that is when I take out the fragmenting tools. Unfortunately, this has meant the loss of a colony or a portion of a colony from time to time. But, in the end, I feel like it leads to a more natural looking reef to allow the corals to grow as they will.
 |
 |
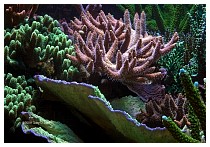 |
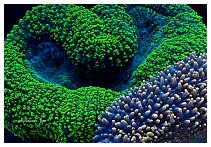
I have IDs for most of the SPS corals that I am keeping (or at least best guesses as to their identification). But rather than list out all of the SPS corals, I’ll just mention that the tank has roughly 60 to 70 SPS species, from the most common green slimers and Montipora digitatas to some more exotic pieces such as A. efflorescens and various encrusting Montiporas. To break it down a little further, there are about 15 types of Montiporas, ten types of A. milleporas and/or A. prostratas, six types of birdsnests, and a few oddities such Hydnophoras and Pavonas. The remainders are various types of Acroporas with table-like, bush-like, stag-like and other growth forms.
Tank Inhabitants—LPS and Soft Corals
In contrast to the SPS corals, which were mainly from my previous tank, most of the LPS and soft corals are new to this tank. These have been slowly added over the past two-and-a-half years to populate the sand bed and some of the tank’s lower and/or shaded portions.
|
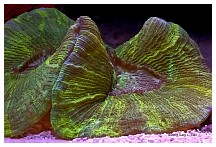
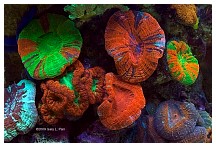
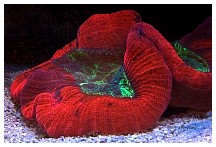
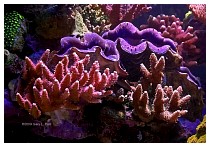
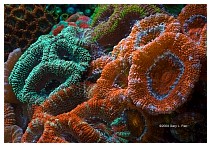
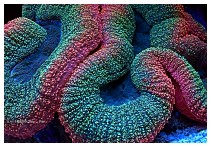
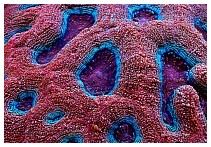
The LPS corals I have collected consist of several varieties of Lobophyllia, Symphyllia, Trachyphyllia, Wellsophyllia, Scolymia, Cynarina, Blastomussa, Acanthastrea, Favia, Favites, Fungia, and Echinophyllia corals. I also have a wall hammer and a frogspawn coral, which were among the very first additions to my previous tank.
 |
 |
 |
 |
 |
 |
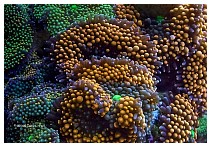
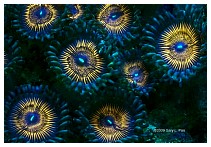
By comparison, there are currently few soft corals in the tank. But recently, I have begun slowly gathering a small collection of zoanthid and Palythoa colonies, as well as developing a small section of the tank for Ricordea florida polyps in a variety of colors.
Tank Inhabitants—Other Invertebrates
The tanks are inhabited by so many other invertebrates that I tend to lose count. The fact that many of them are mainly nocturnal has added to the difficulty of accounting for everything. Once again, some of these are divided between display and grow-out tanks. Still others are kept in the sump or refugium.
|
Other Invertebrates
|
Acknowledgments
I’d like to thank Reef Central for the wealth of information provided, and for allowing me to share my tank and what I have learned here in this article. I’d also like to thank numerous people from our local Wisconsin Reef Society. Without naming names, we have a great group of people willing to lend a hand, and just as importantly, helping to keep the hobby fun. Of course, I’d like to thank my wife Joann, my children and the rest of my family for giving me the time to care for this tank. Keeping up with all of the little things can take up some significant time, and this is for those times I couldn’t respond because my arms were in the tank. Finally, a very special thank you goes out to Gary Parr and Mike Anderson for their excellent photography skills. Without their contributions, my reef tank may not have been noticed by the Reef Central community, and this article would not have been possible.
 |
Feel free to comment or ask questions about my tank in the Tank of the Month thread on Reef Central.
|
If you'd like to nominate a tank for Tank of the Month, click here or use the button to the right. |
 |


